- How to Adjust X and Y Axis Scale in Arduino Serial Plotter (No Extra Software Needed)Posted 7 months ago
- Elettronici Entusiasti: Inspiring Makers at Maker Faire Rome 2024Posted 7 months ago
- makeITcircular 2024 content launched – Part of Maker Faire Rome 2024Posted 9 months ago
- Application For Maker Faire Rome 2024: Deadline June 20thPosted 11 months ago
- Building a 3D Digital Clock with ArduinoPosted 1 year ago
- Creating a controller for Minecraft with realistic body movements using ArduinoPosted 1 year ago
- Snowflake with ArduinoPosted 1 year ago
- Holographic Christmas TreePosted 1 year ago
- Segstick: Build Your Own Self-Balancing Vehicle in Just 2 Days with ArduinoPosted 1 year ago
- ZSWatch: An Open-Source Smartwatch Project Based on the Zephyr Operating SystemPosted 1 year ago
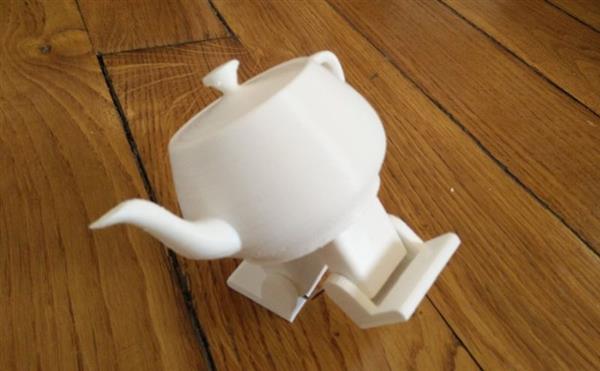
The Disney’s Dancing Teapot is Real!

Have you ever dreamed of your own dancing teapot, just like in the movie Beauty and the Beast? All thanks to micro-computing and Arduino Pro Mini, you can actually create your personal 3D printed robotic dancing teapot. Created by French computer scientist Paul-Louis Ageneau, this little kitchen accessory looks like a two-legged mini-robot.
Ageneau has used 3D-modeling software OpenSCAD to design different parts of the robot teapot and then 3D-printed them in polylactide. After 3D printing all the parts, he has further attached four servos around the legs of the robot and hooked them up to an Arduino Pro Mini microcontroller board. This Arduino board has been programmed to dance and is powered by a 9-volt alkaline battery.
Ageneau’s GitHub repository contains his readily downloadable sketches, as well as the corresponding SCAD and STL files. The French maker also walks you through connecting a piezo speaker to the Arduino, allowing the teapot to play melodies while it dances.
The full set of required materials is as follows:
-
- A 5-volt Arduino Pro Mini board (or a compatible clone)
- A 5-volt switching regulator
- Four 3.7g micro servos, H301 or compatible
- A 9-volt battery connector and a 9-volt battery
- A USB to UART bridge to program the robot
- Dupont wires, M2 screws, pins, prototype board, and glue
- Optional: A piezo sounder to play music


