- How to Adjust X and Y Axis Scale in Arduino Serial Plotter (No Extra Software Needed)Posted 6 months ago
- Elettronici Entusiasti: Inspiring Makers at Maker Faire Rome 2024Posted 6 months ago
- makeITcircular 2024 content launched – Part of Maker Faire Rome 2024Posted 9 months ago
- Application For Maker Faire Rome 2024: Deadline June 20thPosted 10 months ago
- Building a 3D Digital Clock with ArduinoPosted 1 year ago
- Creating a controller for Minecraft with realistic body movements using ArduinoPosted 1 year ago
- Snowflake with ArduinoPosted 1 year ago
- Holographic Christmas TreePosted 1 year ago
- Segstick: Build Your Own Self-Balancing Vehicle in Just 2 Days with ArduinoPosted 1 year ago
- ZSWatch: An Open-Source Smartwatch Project Based on the Zephyr Operating SystemPosted 1 year ago
How to Control GPIO pins with your Raspberry Pi
Thanks to PHP and a temperature sensor, we’ll see how to operate relays and control GPIO pins with a Raspberry Pi.
Using AJAX and installing Apache web server on the Pi, this maker is able to control his Christmas lights using any mobile phone, tablet or laptop.
All you need is:
Hardware requirements
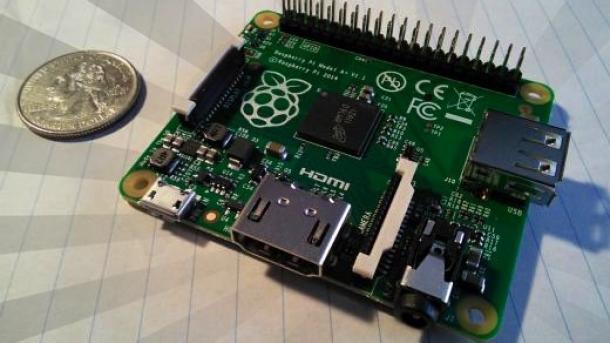
- Raspberry Pi
- SD Card with Raspbian installed (any SD card would work, but I prefer to use a 32GB class 10 card)
- Power adapter
- Jumper wires (female to female and male to female)
- Relay board (I use a 12V relay board with for relays)
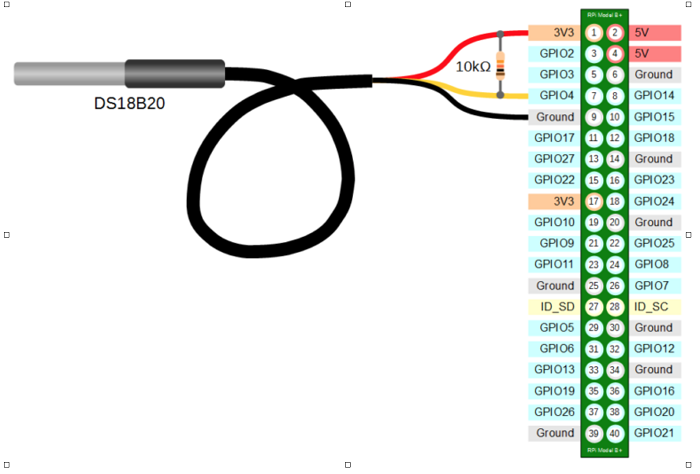
- DS18B20 temperature probe
- Wi-Fi adapter for Raspberry Pi
- Router (for Internet access, you need to have a port-forwarding supported router)
- 10K-ohm resistor
Software requirements
- Download and install Raspbian on your SD Card
- Working Internet connection
- Apache web server
- PHP
- WiringPi
- SSH client on a Mac or Windows client
After the initial board’s configuration and Apache installing phase, you can get on with PHP installation.
Next step is connecting the DS18B20 temperature sensor to Raspberry Pi. Just keep in mind to activate the kernel module for the GPIO pins on the Raspberry Pi and the DS18B20. Enable these modules on every boot.
Caution! Be very careful with the relay connections with Pi because if it causes a backflow of current, you have a short circuit.
Check out the opensource.com related page for full project steps.

Related Posts


-
 Arduino ISP (In System Programming) and stand-alone circuits
We use an Arduino to program other ATmega without...
- Posted 13 years ago
-

-

-
 GSM GPS shield for Arduino
Shield for Arduino designed and based on the module...
- Posted 13 years ago
-
 Small Breakout for SIM900 GSM Module
Some post ago we presented a PCB to mount...
- Posted 14 years ago
-
 How to Control NeoPixel Installations via Wi-Fi Using Fishino and NodeMCU with Python
We create NeoPixel light installations with Fishino and NodeMCU...
- Posted 5 months ago
-
 How to Adjust X and Y Axis Scale in Arduino Serial Plotter (No Extra Software Needed)
The Serial Plotter in Arduino is an excellent tool...
- Posted 6 months ago
-
 Elettronici Entusiasti: Inspiring Makers at Maker Faire Rome 2024
Maker Faire Rome 2024 is ready to amaze the...
- Posted 6 months ago
-
 makeITcircular 2024 content launched – Part of Maker Faire Rome 2024
Applications to MakeITcircular must be in by October 3,...
- Posted 9 months ago
-
 SONY color camera module, 700 TV Lines
Color camera module equipped with a 1/3″ CCD sensor...
- Posted 9 months ago