- How to Adjust X and Y Axis Scale in Arduino Serial Plotter (No Extra Software Needed)Posted 7 months ago
- Elettronici Entusiasti: Inspiring Makers at Maker Faire Rome 2024Posted 7 months ago
- makeITcircular 2024 content launched – Part of Maker Faire Rome 2024Posted 9 months ago
- Application For Maker Faire Rome 2024: Deadline June 20thPosted 11 months ago
- Building a 3D Digital Clock with ArduinoPosted 1 year ago
- Creating a controller for Minecraft with realistic body movements using ArduinoPosted 1 year ago
- Snowflake with ArduinoPosted 1 year ago
- Holographic Christmas TreePosted 1 year ago
- Segstick: Build Your Own Self-Balancing Vehicle in Just 2 Days with ArduinoPosted 1 year ago
- ZSWatch: An Open-Source Smartwatch Project Based on the Zephyr Operating SystemPosted 1 year ago
Exoarm: a $100 Arduino-Powered Exoskeleton Arm

Whether to enhance one’s abilities or to compensate for a loss of strength due to a variety of reasons, the idea of a robotic exoskeleton is an exciting prospect. Furthermore if you are able to create it for only $100, it will certainly be a success.
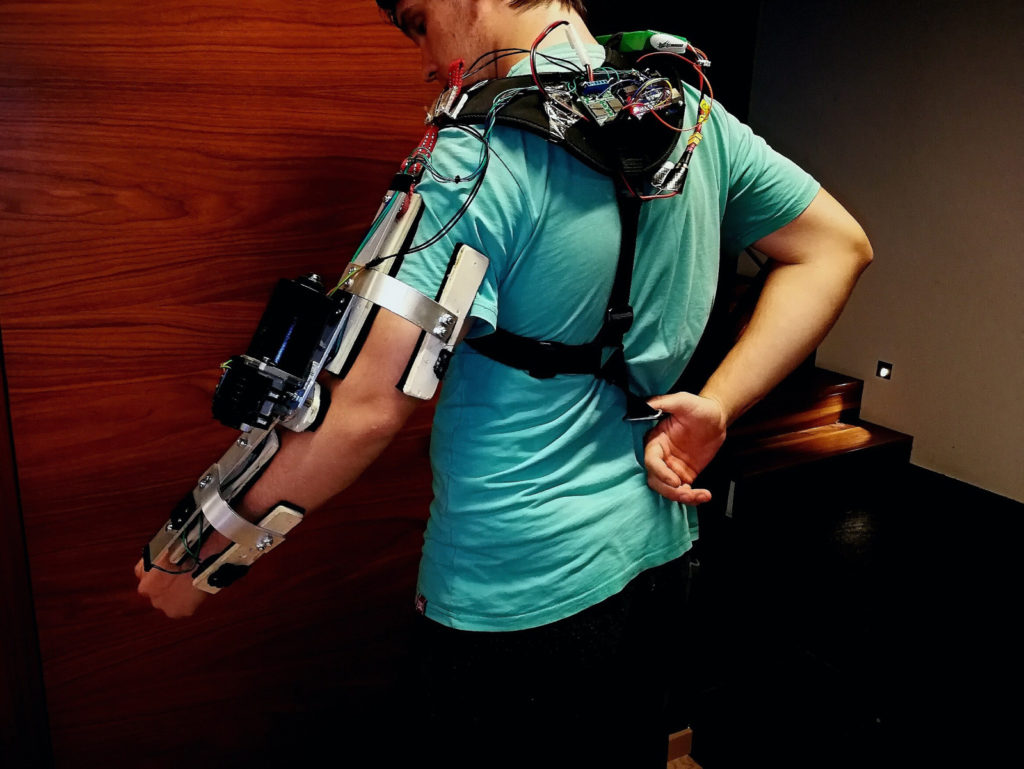
The maker Kristjan Berce decided to make his own prototype assistive arm using simple hand tools to manufacture a bracing system over his left arm.
Exoarm is controlled by an Arduino Uno that powers a windshield wiper motor via a driver board. As set up now, it extends via sensor input, and contracts with the push of a button.
All you need for this project is:
- Strain Gauge with Load Cell Amplifier
- Aluminum 4 x 30 x at least 2000mm
- Arduino Uno/Nano
- VNH2SP30 motor driver
- Car Windshield Wiper Motor
- Long wires
- Potentiometer
- Li-Po battery 3S 5500mAh
- Dad’s hand held lawnmower thing that you put around your body and suspend the lawnmower on
- Screws and nuts. M4 and M6
- Duct tape
- Zipties
- Rope or old dog’s leash
- Wooden plates
- Heat shrink tube
Though it can be seen helping him lift a bicycle at the end of his video, figuring out how to balance any load on the system with his actual muscle’s input is a challenge he’s still working on, but hopes to solve this issue using a strain gauge.
You can follow the project’s progress here.


