- How to Adjust X and Y Axis Scale in Arduino Serial Plotter (No Extra Software Needed)Posted 7 months ago
- Elettronici Entusiasti: Inspiring Makers at Maker Faire Rome 2024Posted 7 months ago
- makeITcircular 2024 content launched – Part of Maker Faire Rome 2024Posted 9 months ago
- Application For Maker Faire Rome 2024: Deadline June 20thPosted 11 months ago
- Building a 3D Digital Clock with ArduinoPosted 1 year ago
- Creating a controller for Minecraft with realistic body movements using ArduinoPosted 1 year ago
- Snowflake with ArduinoPosted 1 year ago
- Holographic Christmas TreePosted 1 year ago
- Segstick: Build Your Own Self-Balancing Vehicle in Just 2 Days with ArduinoPosted 1 year ago
- ZSWatch: An Open-Source Smartwatch Project Based on the Zephyr Operating SystemPosted 1 year ago
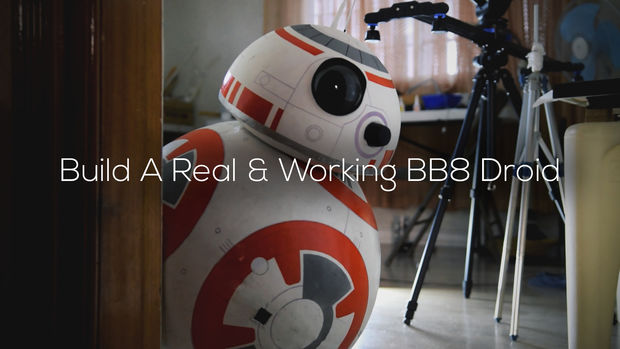
DIY Star Wars Life-Size Phone Controlled BB8 Droid

For all the Star Wars lovers, especially those that liked the Episode VII, a must DIY project from DFRobot blog: the home made BB8 Droid!
Today, I’m going to teach you how to build a working, life-sized, phone-controlled Starwars BB-8 droid! In this tutorial, we are only going to use household materials and a little Arduino circuitry.
Due to the limitation of materials, I resorted in using the materials around me. (deodorant roll-ons as ball bearings, canvas as fiberglass, Christmas balls as the eye & etc.. ). A lot of people could relate to this. My approach on building the project doesn’t require 3D printers, CNCs or Milling Machines!
Materials:
Robotics & Electronics:
– Arduino Uno
– Pololu Dual VNH5019 Motor Shield
– 2x Pololu (19:1) 37D Metal Gearbox
– HC05 Bluetooth Module
– 4 Cell Lithium Battery Pack (2x)
– Switch, DC Jack, Wires, Solder
BB8’s Body:
– Inflatable Beach Ball (Diameter: 50cm)
– Old Newspaper
– Plain Canvas Cloth
– 2 Bottles of PVA Glue (a.k.a Elmer’s Glue)
– 1 Bottle of Woodglue
– White, Grey and Orange (Tangerine) Spray Paint
– Roll-on Deodorants
BB8’s Head:
– Styrofoam Ball (Diameter: 300mm/ 12 inches)
– Christmas Ball (Size of BB8’s Eye)
– WiFi Antenna (Prop Only)
– Cloths Hanger
– Roll-on Deodorants
– White, Grey and Orange (Tangerine) Spray Paint
MISC:
– Superglue
– Neodymium Magnets
On the blog website you can find all the guides and pictures to make the body, the head, every special details and the electronic part.
The phone app sends characters via Bluetooth every time you press a button. The Bluetooth module receives the data while the Arduino interprets and processes these data. The Arduino sends signals to the Motor Driver shield to give a go signal for the switching of the motors.
Steps:
1st.) Mount the Arduino to the platform
2nd.) Stack the Motor Driver Shield
3rd.) Connect the left motor’s wires to M1A & M1B
4th.) Connect the right motor’s wires to M2A & M2B
5th.) Mount The Lithium-Ion Batteries


