- How to Adjust X and Y Axis Scale in Arduino Serial Plotter (No Extra Software Needed)Posted 7 months ago
- Elettronici Entusiasti: Inspiring Makers at Maker Faire Rome 2024Posted 7 months ago
- makeITcircular 2024 content launched – Part of Maker Faire Rome 2024Posted 9 months ago
- Application For Maker Faire Rome 2024: Deadline June 20thPosted 11 months ago
- Building a 3D Digital Clock with ArduinoPosted 1 year ago
- Creating a controller for Minecraft with realistic body movements using ArduinoPosted 1 year ago
- Snowflake with ArduinoPosted 1 year ago
- Holographic Christmas TreePosted 1 year ago
- Segstick: Build Your Own Self-Balancing Vehicle in Just 2 Days with ArduinoPosted 1 year ago
- ZSWatch: An Open-Source Smartwatch Project Based on the Zephyr Operating SystemPosted 1 year ago
DIY a Raspberry Pi Clock and Temperature Monitor

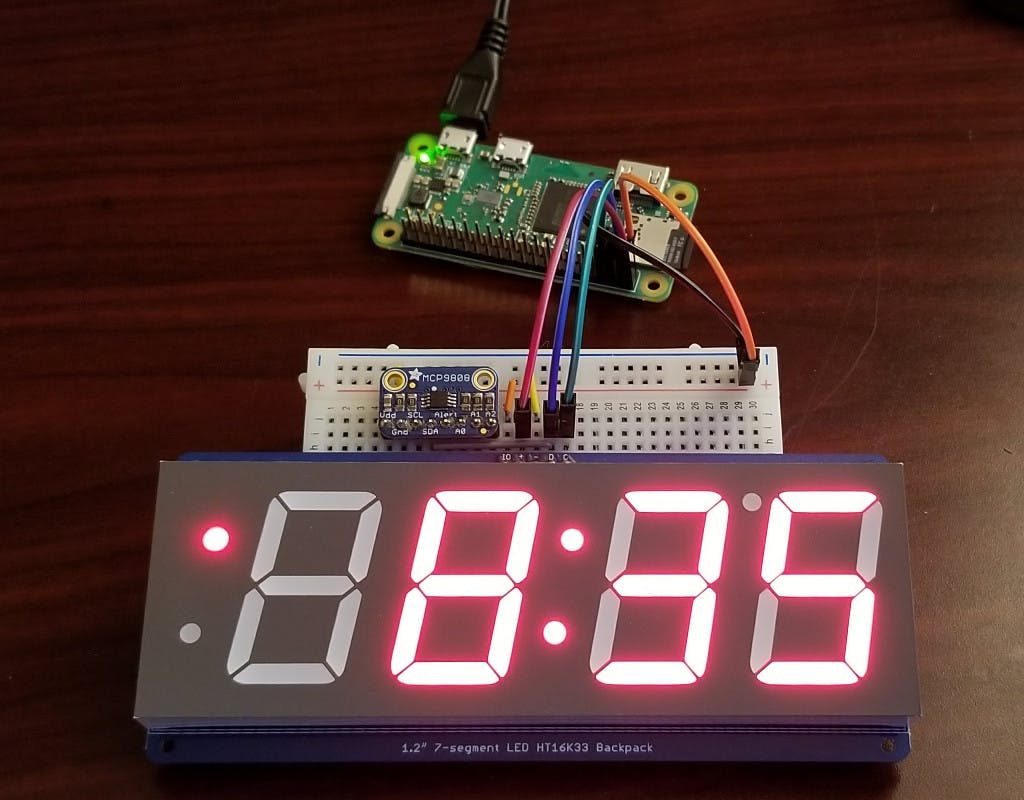
Raspberry Pi enthusiasts searching for a quick project to keep them busy this weekend may be interested in the new Raspberry Pi Zero clock and temperature gauge which has been created by Hackster.io member Jeremiah Mattison.
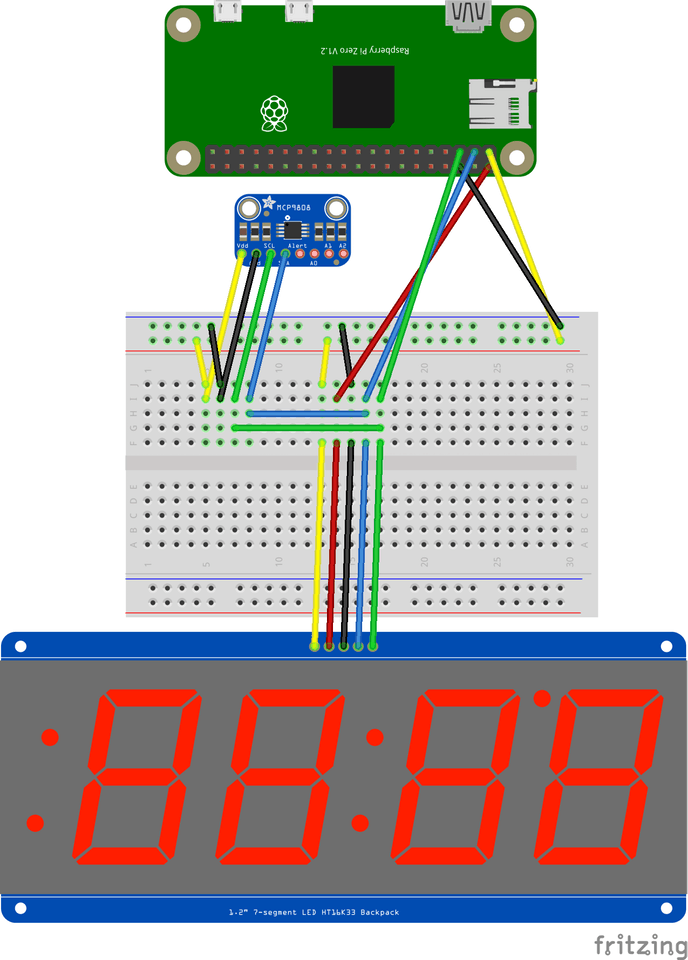
He has Kindly published everything you need including full instructions and code overall in the Hackster.io website allowing you to recreate his Raspberry Pi clock with outside temperature display which uses a connection to the OpenWeatherMap online service. As well as an inside temperature displayed using a MCP9808 sensor.
The clocks display has been created using an Adafruit 1.2-inch 4-Digit 7-Segment Display, and the temperature is monitored using an Adafruit MCP9808 High Accuracy I2C Temperature Sensor Breakout Board. Jeremiah has rated the project as easy and said it should just take 60 minutes or so to create the project.
For this project he used a Raspberry Pi Zero W, but earlier this month the official Raspberry Pi Foundation announced the availability of the Pi Zero WH which comes with headers pre-soldered onto the board, making it even easier to prototype and make connections to the mini PC.
For full instructions and all available code jump over to the Hackster.io website.


