- How to Adjust X and Y Axis Scale in Arduino Serial Plotter (No Extra Software Needed)Posted 7 months ago
- Elettronici Entusiasti: Inspiring Makers at Maker Faire Rome 2024Posted 7 months ago
- makeITcircular 2024 content launched – Part of Maker Faire Rome 2024Posted 9 months ago
- Application For Maker Faire Rome 2024: Deadline June 20thPosted 11 months ago
- Building a 3D Digital Clock with ArduinoPosted 1 year ago
- Creating a controller for Minecraft with realistic body movements using ArduinoPosted 1 year ago
- Snowflake with ArduinoPosted 1 year ago
- Holographic Christmas TreePosted 1 year ago
- Segstick: Build Your Own Self-Balancing Vehicle in Just 2 Days with ArduinoPosted 1 year ago
- ZSWatch: An Open-Source Smartwatch Project Based on the Zephyr Operating SystemPosted 1 year ago
Bring your old analog camera to new digital life with Raspberry Pi
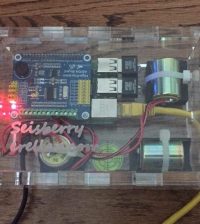
This case is something incredible! Other than protecting your raspberry pi 3 it allows you to connect your Breadboard through the 26 or 40Pin flex cable, now express your creativity! Take beatiful 35mm pictures with your old analog cameras! All you have to do is: – Detach the rear cap from the camera (this works on most cameras between the 50s and the 80s) – Adjust the exposure “hole” to the camera module installed on the back (8mp camera) – Connect the Sync Flash cable from the camera to the case – Set the exposure in “B” (Bulb) and you’re ready to go!
“I’m Back™”works with a great number of camera models and it has a Z X Y regulation which allows to adjust the F stop (24X36mm) which is placed behind the shutter.
It uses the Pi Camera module to take the picture actually, and a touch TFT 2,4″ to control all the settings. From $149 for the 3D printed parts to $349 for the assembled cover bundled with the electronics!
Check the Kickstarter campaing!


