- How to Adjust X and Y Axis Scale in Arduino Serial Plotter (No Extra Software Needed)Posted 3 months ago
- Elettronici Entusiasti: Inspiring Makers at Maker Faire Rome 2024Posted 3 months ago
- makeITcircular 2024 content launched – Part of Maker Faire Rome 2024Posted 5 months ago
- Application For Maker Faire Rome 2024: Deadline June 20thPosted 7 months ago
- Building a 3D Digital Clock with ArduinoPosted 12 months ago
- Creating a controller for Minecraft with realistic body movements using ArduinoPosted 1 year ago
- Snowflake with ArduinoPosted 1 year ago
- Holographic Christmas TreePosted 1 year ago
- Segstick: Build Your Own Self-Balancing Vehicle in Just 2 Days with ArduinoPosted 1 year ago
- ZSWatch: An Open-Source Smartwatch Project Based on the Zephyr Operating SystemPosted 1 year ago
PiCorder, the Raspberry Pi CamCorder

Thanks to the miniature dimensions, you can use the Raspberry Pi Zero to build a tiny camcorder.
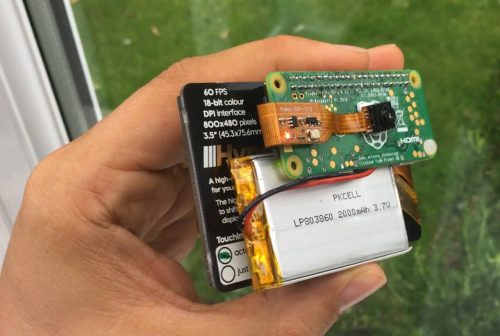
Devised by Wayne Keenan, the PiCorder uses a Pimoroni HyperPixel screen, Pi Zero camera module, and Zero LiPo plus LiPo battery pack.
The PiCorder is probably the slimmest Pi-powered video-recording device ever seen.
With a bit of soldering, you have the hardware gubbins ready to go. All you need then is to install the HyperPixel driver on the Pi, and you are ready to record. The HyperPixel also supports a touchscreen, so you can add a graphical user interface to control it better if you like.
In this basic setup, recording is controlled via SSH. However, there’s a discussion about better ways to control the device in the comments on Wayne’s write-up.
What it could do with, perhaps, is a case to protect the components. That would be an extra project for anyone looking to build a camera like this. The PiCorder is a great project to recreate if you’re looking to build a small portable camera.


