- How to Adjust X and Y Axis Scale in Arduino Serial Plotter (No Extra Software Needed)Posted 6 months ago
- Elettronici Entusiasti: Inspiring Makers at Maker Faire Rome 2024Posted 6 months ago
- makeITcircular 2024 content launched – Part of Maker Faire Rome 2024Posted 8 months ago
- Application For Maker Faire Rome 2024: Deadline June 20thPosted 9 months ago
- Building a 3D Digital Clock with ArduinoPosted 1 year ago
- Creating a controller for Minecraft with realistic body movements using ArduinoPosted 1 year ago
- Snowflake with ArduinoPosted 1 year ago
- Holographic Christmas TreePosted 1 year ago
- Segstick: Build Your Own Self-Balancing Vehicle in Just 2 Days with ArduinoPosted 1 year ago
- ZSWatch: An Open-Source Smartwatch Project Based on the Zephyr Operating SystemPosted 1 year ago
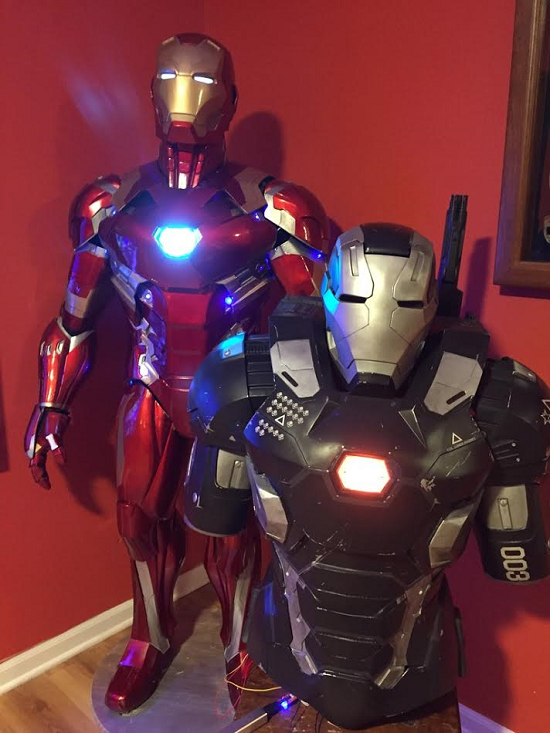
3D Printed Iron Man Suit and the War Machine Mark III for a heartwarming experience

“The original plan was to wear my first suit (red one) to visit children hospitals, but unfortunately the first build just wasn’t strong enough for continuous wear. I needed to find a way to improve on the process.”
This is what Tim O’Sullivan told about his first project: the amazing full-body Iron Man suit.
He bought the STL files for the suit from Do3D.com and got to work on the suit, breaking in his new desktop Robo3D R1+.
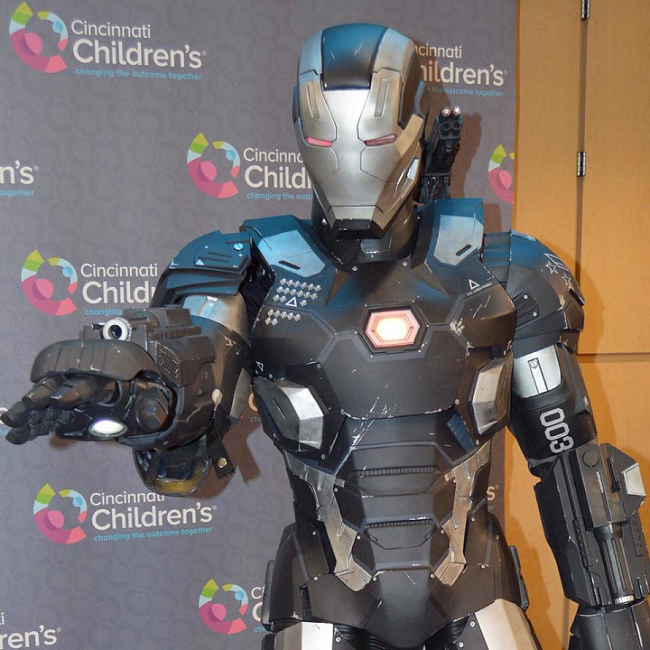
But it was just the beginning, because he has finished his latest 3D printing project – the War Machine Mark III suit from Marvel’s Captain America: Civil War movie.
It features operating servos, which make the shoulder guns rise and fire, has several of the sound effects from the movie, and is voice-activated using the open source electronics platform Arduino. It even plays music!
O’Sullivan needed a build volume that was a little taller than the Robo3D R1+ offered, so he purchased a Rostock Max V3 desktop 3D printer kit and put together the printer first. He got the model for the suit from Do3D.com again, but also used Autodesk Fusion 360 and SolidWorks to make some additional features. O’Sullivan used 3D software like Meshmixer and Autodesk Netfabb to separate the various shells of the parts and slice them, as many of the pieces for the suit were larger than the Rostock Max V3’s print volume.
He made some custom modifications to many parts of the suit and while he’s used PLA in the past, he learned after wearing his Iron Man suit a few times that it wasn’t strong enough for his purposes, and used PETG for the entire War Machine Mark III suit. He also worked to make the interior of the suit stronger by adding fiberglass to each part once it was printed.
After months of work, O’Sullivan made his first of many visits in his 3D printed War Machine Mark III suit to a children’s hospital a few weeks ago.
Click here to find out more about this amazing project.


